Support
Create a New Map
A map allows you to combine datasets, tell a story, and share insights with others. You can use a map to highlight a single dataset on top of a base map or combine multiple datasets to show relationships between them.
See Making Maps documentation for more detail.
1
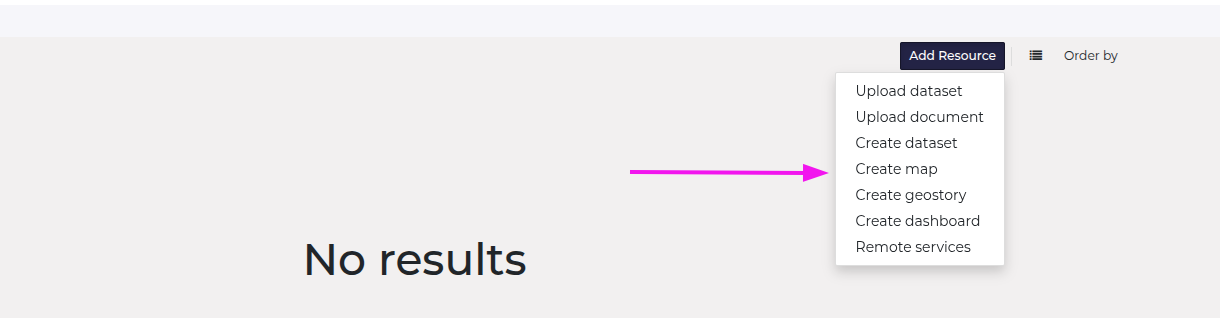
Create a new map
- Click "Create Map" button
The Create Map button is available from the "Add Resource" dropdown on any catalogue page, or from the menu on a dataset page.
2
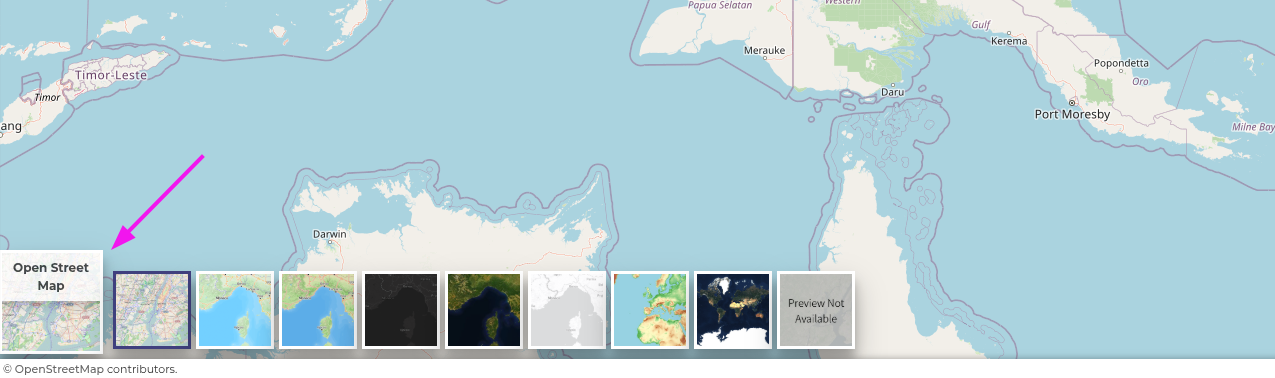
Change the base map
Click the current base map image on the bottom left of the map to open a selection of additional base maps.
3
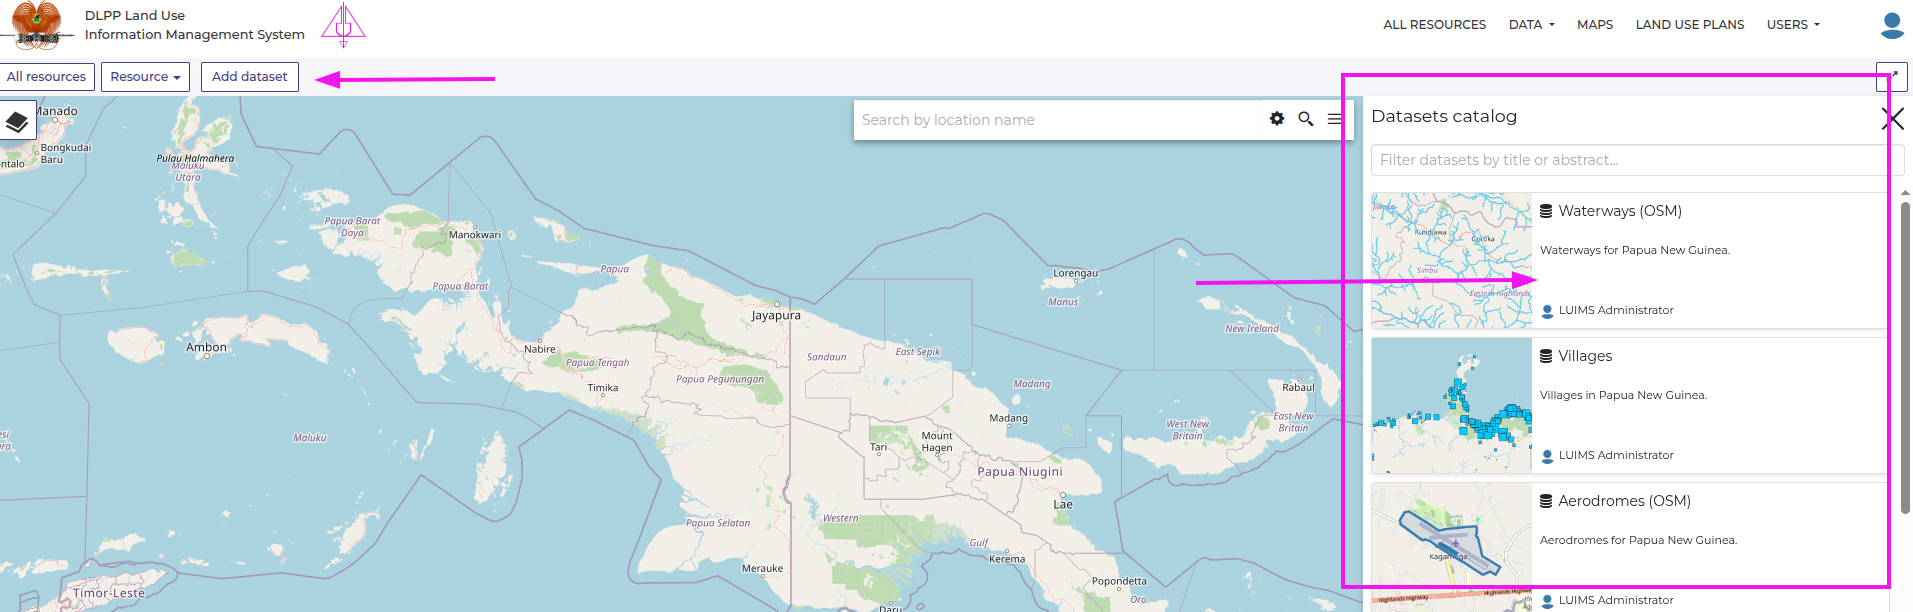
Add data
- Click Add dataset button
- View Datasets Catalogue overlay on the right.
- Click on a dataset card to add it to your map.
4
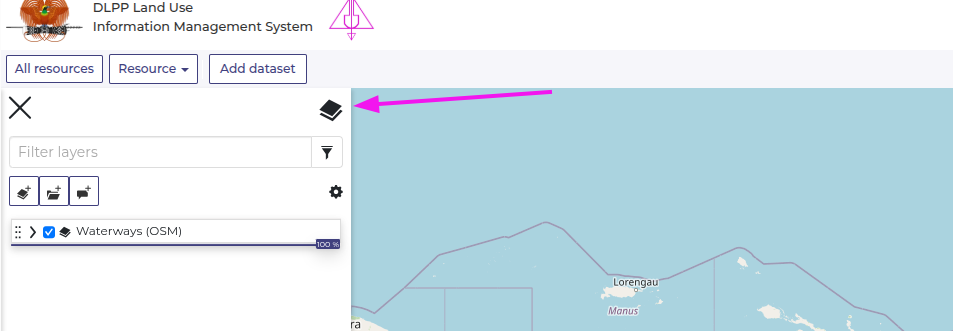
View layers
Open the layers panel using the layers icon.
5
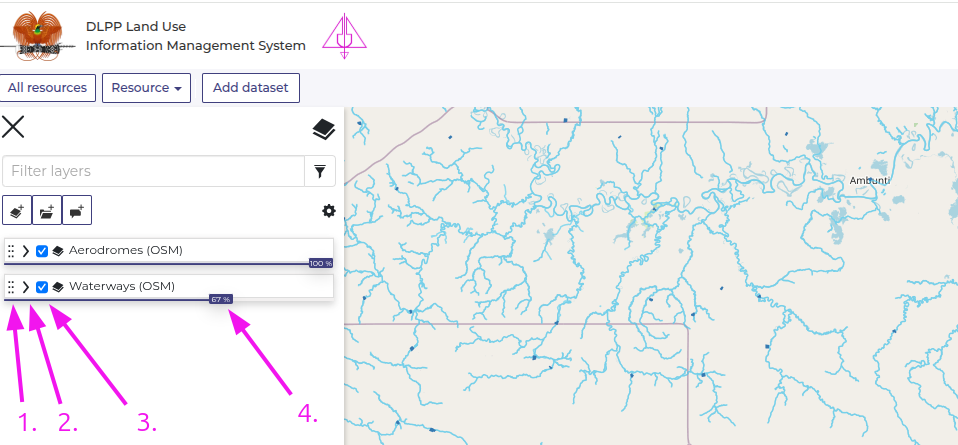
Managing layers
- Reorder layers by clicking and dragging the dotted icon next to a layer name.
- View more information about a layer by clicking the dropdown icon.
- Toggle layer visibility using the checkbox next to the layer name.
- Change layer opacity using the opacity slider.
6
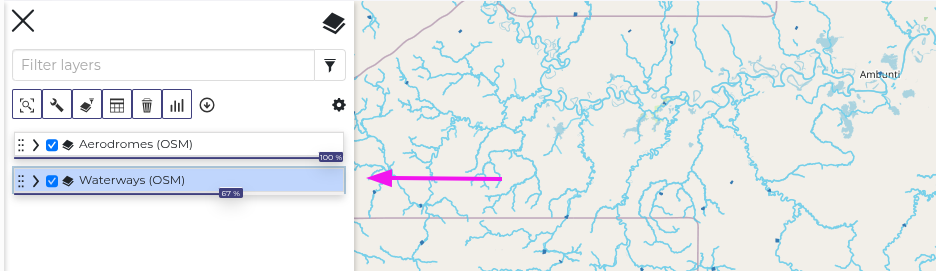
Creating an active layer
To make a layer 'active', click the layer name. It will show as highlighted in blue when it is active, and a new set of icons will become visible at the top of the layers panel.
7
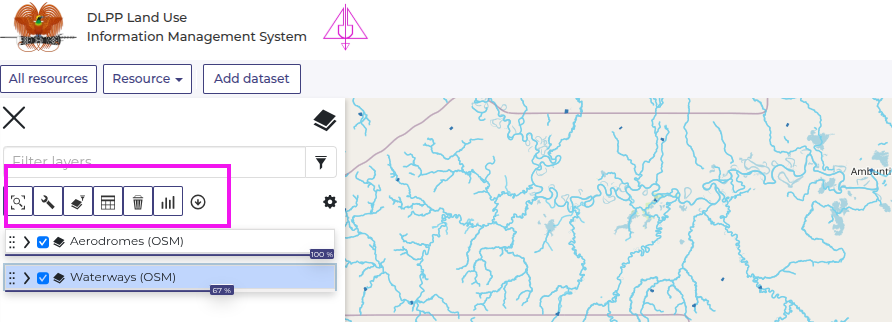
Working with layers
When a layer is active, these buttons allow you to perform new operations on that layer, including:
- Zooming to layer extent
- Applying filters to the layer data
- Viewing data attributes
- Deleting a layer
- Exporting layer data
- Styling
8
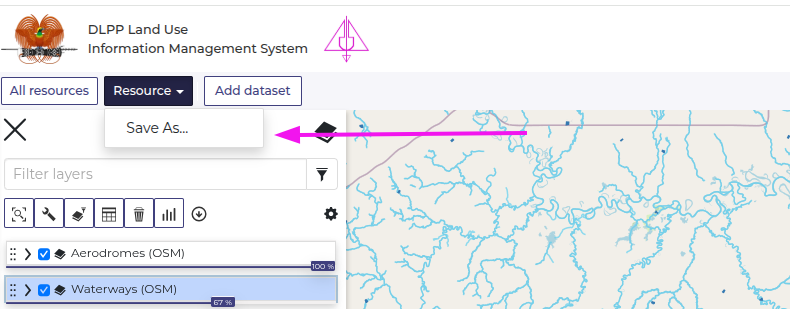
Save your map
- Click the Resource button in the Resource menu.
- Select Save As and enter details.